2.9 KiB
Post-installation instructions
Although the installer automates most of the configuration, some manual steps are still required.
Access without SAML
Once installed, services are accessible without SAML, it can be useful to complete or check some configuration.
login detail are defined in dd.conf.
| Service | Variables | Login without SAML |
|---|---|---|
| Moodle | MOODLE_ADMIN_* |
https://moodle.DOMAIN/login/index.php?saml=off |
| Nextcloud | NEXTCLOUD_ADMIN_* |
https://nextcloud.DOMAIN/login?direct=1 |
| Wordpress | WORDPRESS_ADMIN_* |
https://wp.DOMAIN/wp-login.php?normal |
| Keycloak | KEYCLOAK_* |
https://sso.DOMAIN/auth/admin/master/console |
| Admin | DDADMIN_* |
https://admin.DOMAIN |
SAML user for testing
To be able to check all services you need to create a SAML user. This is done in administration application in https://admin.DOMAIN. There follow next steps:
- Create a group, for example: "teachers"
- Click Resync button.
- Go to groups and verify that group exists.
- Go to users and create a "teacher01" of group "teachers" with role "teacher"
Activate WAF
If you wish, you can enable Web Application Firewall/Modsecurity following these instructions.
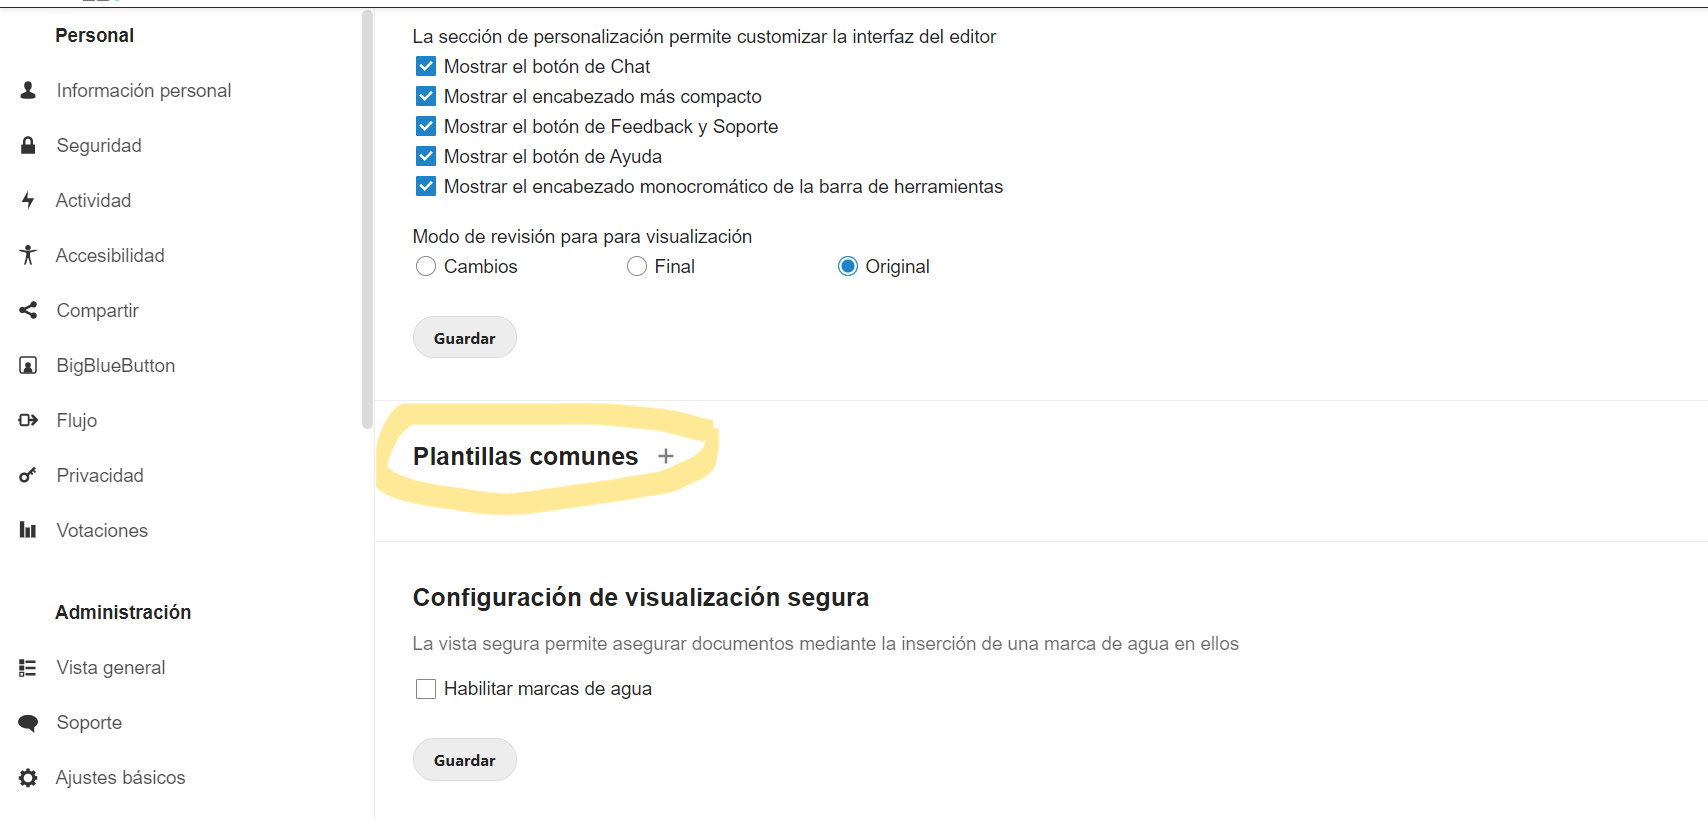
Nextcloud common templates (Optional)
It is possible to set common templates to all users:
Integration Moodle-Nextcloud
The integration between Moodle and Nextcloud is not automated, next steps must be followed once DD installation has finished.
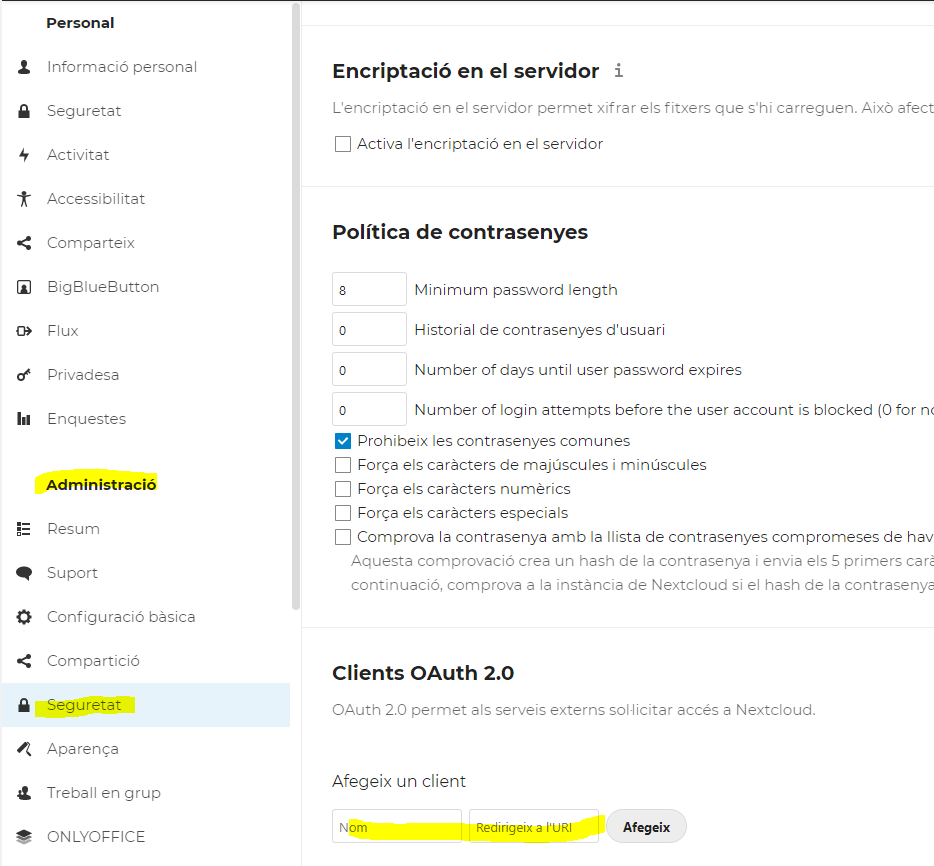
Create a Oauth client in Nextcloud
- Name: moodle
- URI: https://moodle.test1.digitaldemocratic.net/admin/oauth2callback.php
The created Client ID and Secret, must be added in Moodle's OAuth2.
Create the service OAuth2 in Moodle
https://moodle.test1.digitaldemocratic.net/admin/tool/oauth2/issuers.php
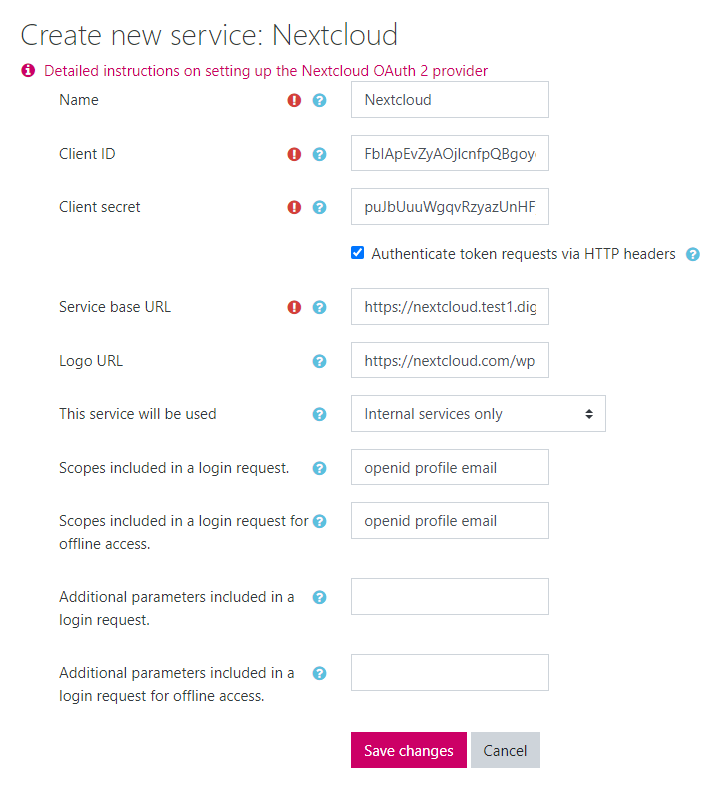
Create new Nextcloud service
Configure as this:
- Name: Nextcloud
- Client Id: Client ID
- Client Secret: Secret
- [OK] Authenticate token requests via HTTP headers
- Service base URL: https://nextcloud.test1.digitaldemocratic.net
To test that it works, click on the next icon:

And follow the authentication steps that indicates Nextcloud. A green tick, means that configuration is ok and it is working.
Enable repository in Moodle
- Go to 'Manage repositories' https://moodle.test1.digitaldemocratic.net/admin/repository.php
Enable and make it visible
Go to Nextcloud repository configuration:
Enable both options and save:
Create an instance of the repository with these values:
- Name: Nextcloud
- Issuer: Select the OAuth2 created earlier
- Folder: ''
- Supported files: Internal and External
- Return type: Internal


